Best Plants To Live Soil-Free
Best plants to live soil-free
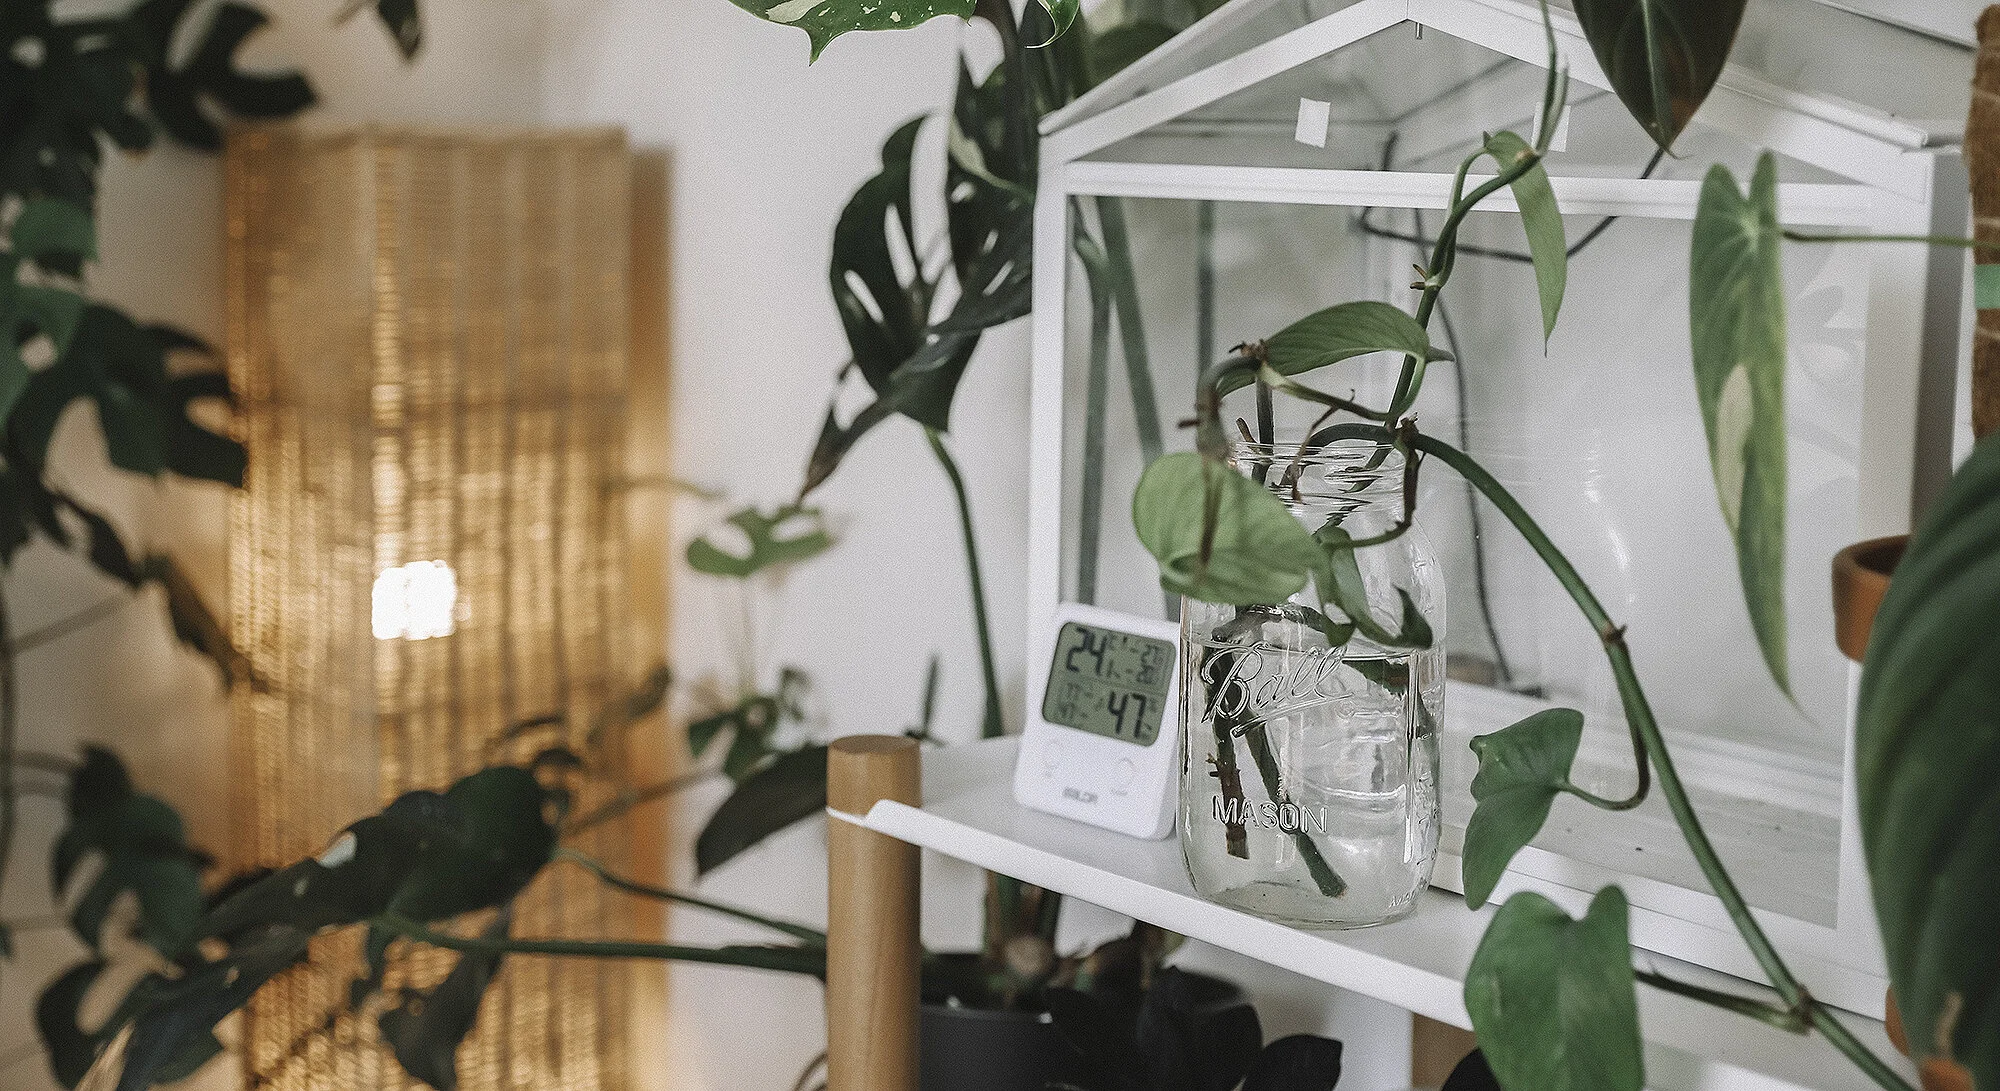
So you might be wondering why are we setting plants up in water? The reason for this is basically because I think they look really excellent as a decoration in the home.
I have a lot of plans set up in soil but there’s something different about how they look when they set up in water. I think they bring an interesting feature to the room, and I love the way the light plays off them.
I also think that if you wanted to give somebody a little plant gift giving them a plant in water is an excellent little treat to add to their home.
There is another method of planting your indoor plants which is called semi-hydroponics. For a semi-hydroponic set up you would use clay aggregate which is shortened to LECA. I personally prefer to use soil for a majority of my plants and not LECA because I don’t want to have to go through the process of moving and flushing my plants, I have a lot of them and it would just be too much of a pain for me.
PH Balance
PH plays a role in soil and also in water. If you’re planning on keeping your plants in water for a long period of time I would recommend pay some attention to the pH level of the water to make sure what the plant is able to get all the nutrients that it needs.
I heard a great quote that was, “if the nutrient is the lock then the pH is the key.”
If you’re just throwing a cutting into water to use the water to propagate the plant I wouldn’t worry too much about the pH of the water. But if you’d like the plant to successfully grow in the water for a long period of time we’re going to need to make sure that it’s able to absorb the nutrients that it needs. When there is no soil that the plant is growing in there is no organic matter, there are no micro organisms, and there’s no interaction between soil and water that would regularly occur for an indoor plant.

PH ranges on a scale from 0 to 14, with 0 being the most acidic, 14 being the most alkaline, and 7 being neutral. All plants are going to be a little bit different. Some more prefer water that’s a little bit more acidic; some more prefer a little bit more alkaline, but for the most part many plants will do well in a pH range of 5.8 to 6.3.
To track the pH of your water and monitor it you can use a digital pH test kit or you can simply pick up some litmus paper.

Link to digital test kit

Link to litmus paper
When it comes to fertilising I like to keep things reasonably minimal, but you could definitely go ahead and get a more complex set up if you want to have more plants in water. I just have a few little ones around the house, and I am by no means a hydroponic expert.


Marimo Moss Ball

A Marimo Moss ball is actually a form of algae.
I like to think that these look like a fuzzy little meatball. In their natural habitat they can grow between 8 to 12 inches in diameter. And apparently these plants can live for more than 100 years.
Caring for your moss ball is incredibly easy. When it comes to light you want to make sure that they receive even in direct sunlight throughout most of the day. They’re native to cool lakes and should be kept in cooler temperatures, so be sure to make sure your moss ball isn’t sitting in direct sunlight throughout the day, this could really agitate the plant.
Every now and again it’s a great idea to change the water on the jar or cup which your moss ball is living in. You might start to see other types of algae forming around the edge of the jar. To clean it out all you have to do is empty out the jar give it a wash, and then wash your moss ball under running water, just use your hand to gently clean it. Do you want to clean it and change the water every 1 to 2 weeks, and you can use just regular tap water provided you don’t have hard water in your location.
Pothos
Pothos will actually grow as easily in water as it does in soil. These honestly have to be one of the hardiest plants that I know, and I feel like I’m constantly featuring them in all different kinds of plant videos that I do.
The easiest way to start the process in water is by taking a cutting of another plant that you already have. Just be sure that you let the cutting callous before putting it in water and make sure to pluck off the bottom one or two leaves so that the leaves aren’t sitting inside the water. To take your cuttings simply cut between two nodes and then pull off the two leaves closest to the cutting. Now you can either let your cutting sit on the bench or you can put some cinnamon on the end of the cutting to allow it to callous quicker.
The vine would like to be in bright, indirect light. The great thing about putting your pothos cuttings in water is that you can actually take multiple cuttings and stick them all into the same jar or vase and they make a really interesting feature in your room. After a few weeks you should see them start to sprout roots into the water and once it’s been left in there for a long enough period of time the roots will start to take over the bottom section of the vase or jar.
Keep an eye on this plant - as too much sunlight will cause the leaves to start to turn brown or yellow. And make sure that you replace the water inside the container every 2 to 3 weeks. A simple way to do this is to pull the vines out of the water and use an old toothbrush or an old cloth to scrub the inside of your jar or vase. Be sure to remember to use a liquid fertiliser every 4 to 6 weeks throughout the year, more often in summer, and less frequently in winter.
Heart-Leaf Philodendron

This is another one of my favourite plants, I absolutely love how the heart-leaf philodendron looks when they start to get bushy and multiple vines are packed together. In a similar fashion to the pothos you can take many cuttings and combine them together into a single jar or vase to create a unique water plant feature in your home.
The heart-leaf philodendron prefers indirect sunlight, but it will do well in most environments, it’s not a very fussy plant. It will even tolerate areas that have lower light levels, but over time you may start to notice this will impact the size and the colour of the leaves.
To start this plant in water you can either start it with a cutting, to do this you want to cut a vine below a leaf nodule, allow the cutting to callous, and then place the stem in water. If you have a mature plant which you want to transfer over to water all you need to do is wash out the root clump and then transfer the plant into a jar or vase of your choice with some fresh water.
However, be aware that if you’re taking a more advanced plan and transferring it over to a full hydroponic set up then maybe some leaf floss as it’s a big shock for the plant.
Peace Lily
A Peace Lily growing in water with stones in the bottom of a large vase is something that I would love to have as a bathroom feature when I have a home that actually has bathroom windows haha.
There are arguments that this plant cannot live in water indefinitely, but I have had a Peace Lily living in water for over six months now and it is thriving more than my Peace Lily which is in soil. My best piece of advice for growing your Lily in water is to start with a younger plant which is less mature. By starting with a smaller plant and allowing it to grow in the water it will adapt to the situation and it will grow small roots, rather than large soil roots.
For a piece Lily it’s a great idea to use distilled water rather than tap water. If you purchased a plant or you’re taking one that you already own make sure that you thoroughly wash all of the soil of the roots before placing it into water. You want to give the peace lily some liquid fertiliser every 2 to 3 weeks, or less frequently during the winter months. Every 1 to 2 weeks to change the water out of the Peace Lily’s vase or jar but be careful not to let the roots of the plant dry out as they have adapted to be in the water.
Peace lilies love indirect sunlight and they can actually even do quite well in homes or offices were very little light is present. Too much sunlight, particularly direct sunlight, is likely to burn the leaves.
Tradescantia Tricolour

This plant is tough, even if you don’t really have a green thumb you shouldn’t have a hard time growing the Tradescantia Tricolour. The plant is popular for having multiple colours across its leaves, regularly featuring purple, pink, and green.
I couldn’t find too much information about keeping this plant growing in water over the long term, but it very easily can be propagated in water. I am using my two set up’s as an experiment to see how long this plant lasts when does grown fully hydroponically.
To start yours in water you can either take a full plant which is mature, wash the soil off the roots, and place it into a vase or jar with some fresh water. Or alternatively you can take a cutting and place the ends of the cutting into some fresh water. Tradescantia Tricolour will grow roots extremely quickly and within 24 hours you should start to see some root growth appearing in the water.
Some of the links featured in this post are Amazon affiliate links, and I may receive a small commission for you shopping with these links. Using an affiliate link does not affect the price which you pay, but it does allow me to help keep creating more content for you.